
Dunia digital mendorong lahirnya industri-industri baru bagi Ekonomi Digital Indonesia. Hal ini disebabkan oleh perkembangan teknologi yang berkembang pesat dan

DAPATKAN SEMUA BERITA ATAUPUN INFO YANG ANDA CARI HANYA DISINI
Dunia digital mendorong lahirnya industri-industri baru bagi Ekonomi Digital Indonesia. Hal ini disebabkan oleh perkembangan teknologi yang berkembang pesat dan
Apakah Anda sedang mencari cara-cara menyenangkan untuk mengisi waktu luang? Mengapa tidak mencoba main slot Olympus? Slot Olympus adalah permainan

Salah satu metode meningkatkan peluang kemenangan di permainan slot online olympus yang banyak dicari adalah menggunakan aplikasi cheat tertentu, seperti
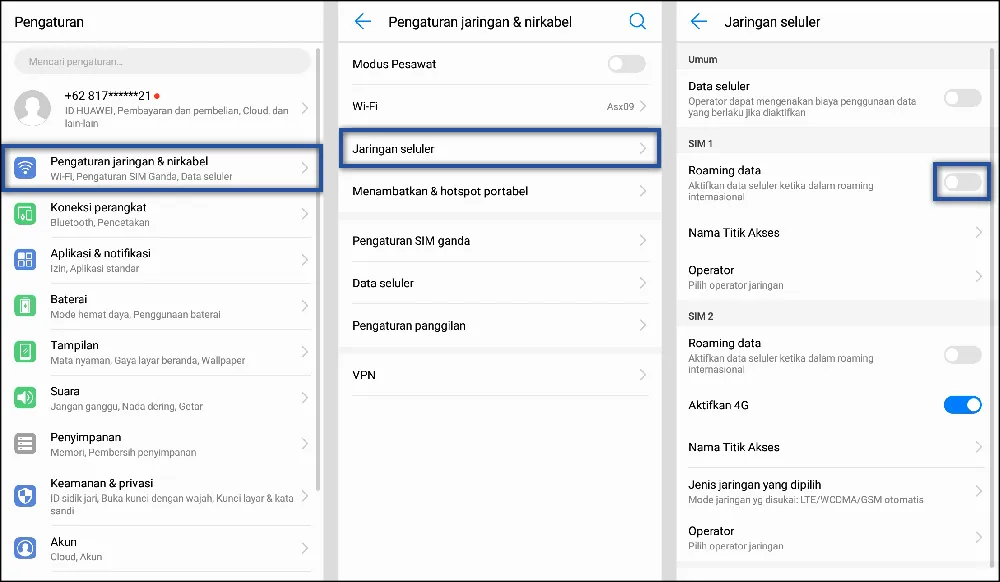
Data roaming adalah cara untuk mengakses internet di ponsel Anda, seperti aplikasi chat atau internet browser. Data roaming memungkinkan Anda

Jika Anda merasa sangat lelah dengan masalah, laptop Anda adalah salah satu cara untuk membuatnya sembuh. Namun, jika layar tidak

HP Xiaomi terbaik telah menjadi salah satu merek ponsel cerdas paling populer di China, dan sekarang berkembang di luar negara


